PATIENT STATEMENTS
INTRODUCTION
The Patient Statement functions have been designed to allow you to send requests for payment of services to the patient and/or the responsible party. A consistent, prompt and accurate patient billing system is indispensable to your collections department, and consequently to the office cash flow.
. This column is Patient Statement Related functions. It consists of:
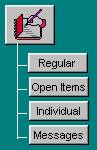 |
I. Print Regular Statement
II. Print Open Item Statement
III. Print Individual Statement
IV. Access to Statement Messages
Figure D.1
At the time of printing, after selecting the form of statement (Balance Forward or Open Item), you may elect the type of paper form you wish to print on. The different forms available are: Pre-Printed Statement Forms, Statement Mailers, or Blank Paper. It is entirely up to your office to decide which accounting method they will utilize to disclose balances to patients, and the type of forms they wish to print on.
Brief Explanation
Regular Statements (Balance Forward statement)
A Regular (or Balance Forward Statement) is very similar to any monthly credit card statement. In this type of statement the balance as of the last statement date is listed as a Balance Forward amount, and any activity to the account since the last statement date is noted in detail.
Open Item Statement
An open item statement is one where every claim, regardless of age, is listed reflecting any adjustments and/or payments received against it. Further, it denotes the balance due per each open claim, with a total amount due on the account, listed at the bottom of the statement.
This type of Statement is very detailed and because of its nature it may take many forms or paper to print. Many offices prefer it, because its given detail, it makes it easier for patients to identify the source of the balance due; thus, reducing the number of telephone calls generated by patients to query on the statement balance shown.
Individual Statement
This function gives you the opportunity to print out a statement for a particular sequence number and patient.
I. Print Regular Statements
From the main screen of the program, click on either the button that reads “Regular” or “Open Items” depending on what type of statement you want to print. Once you have made you selection the system will bring up a screen and prompt you with some questions in order for the system to be able to select the patients you wish to print.
Starting and Ending Patient ID
The system will then prompt you to enter the starting ID number of the range of patients you wish to bill. This is used by practices with various patient-billing cycles, based on the patient ID number. The next field will ask you for the ending ID number giving you the ability to run statements for a specific range of patient ID numbers. In the event that you want to print statements for all patients regardless of their ID#, simply skip over thee two fields leaving them blank.
Patient Classifications To Include
The next prompt, Classifications to Include, is used by practices that only send statements to certain patients, not all. This prompt allows you control of the statements to be printed.
Example: Your office only sends statements to Self-Pay and Private Insurance patients. The applicable patient classification codes are : SP and PI, respectively, as set up by your office through the Edit System Codes section of the package. Your entry to this prompt will be: SP,PI
That is, the system will only print statements for patients classified as above requested. In the event that your office submits statements to all patients; regardless of their classification simply skip over this field leaving it blank. If you are not sure which is the classification that you need, you can click on the drop down arrow in this field and choose the appropriate code.
Patient Classifications To Exclude
If you wish to execute this function for all of your patients, regardless of their classification, simply press return. However, in the event that you want to execute this function for all of your patients, except one or several patient classifications, then enter here the internal system codes that correspond to the patient classifications you wish to exclude. If at this time you do not remember the classification code needed at this time, you can click on the drop down arrow located in this field to see a list of your internal classifications codes. Choose your code accordingly.
Example: You wish to exclude from this function all those patients whose classification is FRIEND.
ENTRY. FRIEND
Note: You may leave both the Include and Exclude patient classification fields blank, and the system will base its selection on all patients that match the rest of the criteria. However, when you include only certain patient classifications, then consequently there exist nothing to exclude. The same happens when vice-versa, you decide to exclude certain patient classifications. For if you use or instruct the system to do both, include and exclude, that is really a contradictory statement, which would not be understood by the system.
Physician to Include
The next prompt, Physicians to Include, can be used to send statements to patients seen by certain physicians, not all. This prompt allows you control of the statements to be printed. That is, the system will only print statements for patients requested. In the event that your office submits statements to all patients; regardless of their physician simply skip over this field leaving it blank. If you want to print for more than one physician you can enter here their codes separated by commas.
Family Statements
Your entry here is either "Y" or "N". "Y" for Yes, or "N" for No. If your office prints family statements, when applicable, reply Y; otherwise, enter N. A family statement is one, which prints addressed to the Head of Household but denotes on it the balance due per each patient in the family nucleus.
Show credit balance
Your entry here is either "Y" or "N". "Y" for Yes, or "N" for No. If you want the statements to show any credit balances enter “Y” Yes otherwise enter “N” No.
Starting Date (self-evidently, not in Open Item Statement)
This field is prompting for the entry of the date as of which it should start detailing transactions on the statement. Any outstanding balance due from a transaction, which occurred prior to the date entered in this field will appear as a balance forward. The system will use this date to know what amounts is supposed to list as balance forward, and show in detail any transaction activity which took place after said date.
Activities Date After
Enter here the date that you want the system to begin listing activity, on and after this day. From the date that you enter and onward the system will show this activity on the statements.
Minimum Patient Amount to Bill
Enter the minimum balance amount a patient must have in order for a statement form to print.
Example: Your office only sends statements to patients who meet the requested criteria and whose balance is $5.00 or more.
ENTRY. 5.00 (NOTE: When entering the dollar amount here do not enter any symbols such as: $$$, as these will not be understood by the program, and can cause problems at time of printing.)
Stmmt Form To Use
This section is dedicated to specify to the system the type of statement form your office uses. This question can be eliminated by setting the default type of form in the section of your system called "System Management", under "Tailor system to user". Please refer to the section of your manual entitled "System Management". The available choices of entry are as follows:
1 Pre-Printed Forms
2 Statement Mailers
20 Walkout receipt form
3 Regular Blank Paper
Pre-Printed Forms: Self-explanatory, it is a statement form which has been pre-printed and to which our program aligns to.
Statement Mailers: Forms, which do not require folding and insertion into an envelope, as they are self-contained. They also include a self-addressed patient reply envelope. There may be some exemptions. The usage of this forms requires the availability of a wide carriage, 136 columns, printer.
Walkout Statement: Prints on plain white paper; however its form is that of a patient walkout receipt, as may also printed through the Transaction Management section of this package. This type of form is usually requested when an specific patient requests a receipt for a prior day visit.
Regular Paper: Self-Explanatory. All of the statement information will be printed on plain white computer paper.
Times to bill Procedures
Enter here the maximum number of times that your office wishes to show a service on a patient statement. The system maintains the number of times that a procedure has been billed. This number is reflected when the patients ledger is displayed. This option is only available for those practices using line item posting.
Once you have answered all of the above captioned prompts click on the OK button to commence preparing the report. You will see a window pop up and progressively see the report reach the system reach 100% Your Printer properties window will then pop up and you will proceed to enter the printing specifications and send it to print.
Note: Please be aware that many of the questions that are asked in this section, such as the type of statement for, whether or not to ask for which activity date to print etc... and some other can be entered in the section of the system entitled "Tailor System to User".
II. Print Open Item Statements
From the Main Menu select Patient Statements, in the subsequent menu select Open Item Statements. For more assistance on what to enter or reply to the prompts that will follow refer to the Running Balance Forward Statements section of this manual.
III. Print Individual Statement
To access this function, using your mouse click on the button that reads “Individual” in the Statement related functions column of the program. The system will bring up a window asking you Enter here the ID# of the patient for which you would like to retrieve a patient service record. If at this time you do not know the patients ID# you, Right click in the field provided. This will bring up a screen where you can search for patient by First or Last name, or leave this area blank and click on “find” to search through the whole Patient List. Whether you entered the Name or are searching the list, once you have found the patient you need, mark it by clicking somewhere on that row and either press ESC. Or close the window, the system will then place the patient id you choose in the box asking for patient id then press enter or click on okay. Once you have selected the patient the system will then allow you to enter the sequence number. If you do not know the sequence number right click on that field, If this patient has a service entered, the system will prompt you with “Do you want to see only Services with Balance?” Click on Yes or No accordingly. To choose the sequence number using either your mouse to highlight it or using the arrow keys on your keyboard, move up or down through this list. Once you have found the sequence number you need keep it marked and close this window. The window will also contain a field that ask you “Stmnt Form to use”, although this is a comes default from “Tailor to User” section of the package, you can edit this area if necessary.
atement Messages
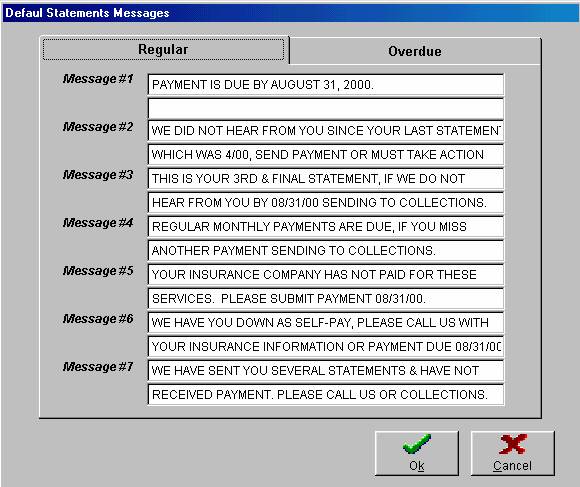
Figure D.2
The system has capacity for printing two types of messages on the statements. These are: Regular, and Overdue Due Messages.
REGULAR: Any two-line message your office wishes to print on patient statements. You may store up to seven regular messages on the system. The system will know which message to print on each patient statement, by referring to the information entered on the patient demographic record found in the Patient Management Section of this package.
PAST DUE: Any two-line message, which should be printed on the patient statements. The system has capacity to store up to seven messages. The first will print on all 30 days past due account, second on 60 days past due, third on 90 days past due, and so on.
Note: You can set up in the "Tailor System to User" section of the system to have the program age the patients account either on payment date or on the service entry date.
If your office has patients, which regardless of the age of their account balance, they do not wish to print past due messages, this can be specified through the third page of the patients demographical information screen. Refer to the section of the manual entitled "Patient Management" for more information on how to specify this in the patients record.
How To Enter Statement Messages
From the Main Menu select the icon that reads “Messages” in the statement related functions column. There are two tabs, Regular or Overdue Messages. From here you can add delete or edit these messages by click on the appropriate tab and field. Each message is numbered. This number must be the same as entered to the patients through the Additional Patient Information section of this package, found within Patient Management. If no message number is thereby assigned to the patient, the system will automatically assume or default to Message #1.
In the space thereby indicated enter the message or messages your office wishes to include in the statements. These messages may be changed monthly, and are often use to express greetings, such as:
Happy Father's Day, or Happy Holidays, etc ...
To enter your office past due messages follow the same steps as for entering regular messages. Only in this case you will elect the Overdue tab from the Statement messages screen.
Why a Statement Will Not Print
I.
Patient ledger has one balance but the statement shows another. Refer to the Patient demographical record and identify the insurance company, which the patient has. In the event that the patient has insurance proceed to the Edit System Codes section of the package, and retrieve the correspondent insurance company. For information on how to retrieve a Patient Demographical Record refer to the Patient Management Section of this manual. To find out how to retrieve an insurance company code refers to the Edit System Code section of this manual.
In the insurance company code verify the answer to question: Show on statement only after this company pays? If the answer here is affirmative, Y, that is the reason for the discrepancy between ledger and statement. Basically a Y here instructs the system to only disclose on the patient statement any balance due from any service already paid by the insurance company. Any balance from a service pending payment from the insurance company will not be reflected, until payment from the insurance company is received. Otherwise, if next to the question, Show on statement only after insurance company pays, which your office replied to affirmative 'Y', in the field number of days, there is a number other than 0, then the charges will show on the patient statement even when the insurance company has not paid, when the charge is overdue more than the number of days thereby specified.
The system tracks payments for services based on your payment posting entries. That is why, it is essential that the person posting the payments received makes sure that they are applied to the correct service sequence number. For more detailed information on how to post payments, refer to the Transaction Management Section of this manual.
II:
The reason above listed under I. can also cause a statement not to print, based that if none of the services incurred by the patient reflect a payment from the insurance company, nothing will print. Unless they are past due by the number of days indicated through the insurance company code.
III:
Verify the patient entry record found in the Patient Management section of the package, to make sure that where it says <SEND STATEMENT> the reply is Y. Otherwise, if any other letter, symbol, or blank appears here a statement for said patient will never be generated; even when the patient meets all of the criteria specified for printing of patient statements.
IV:
If a certain procedure will not print, request a patient ledger, and verify the number of times that a procedure has been billed. If the number of times billed exceeds the amount that you entered in the selection criteria to print the statements then the system will not print it out.
V:
If your office prints statements based on the patient responsibility rather than the overall account balance, and the patient balance of the service that will not print is less than the minimum balance specified, a statement will not be generated. This is although the overall balance of the service is greater than the minimum.
SUMMARY
We have now completed covering the section of patient statements. You will find this function of the system to be very efficient and helpful to your practice. Proper collection of your patient balances is a crucial element to the well being of any practice. The system provides you with a fully automated system that will streamline your patient statements, and collection.