SYSTEM MANAGEMENT
Introduction
This selection is very specialized and should be password controlled given that this is the section where transactions posted may be deleted. In addition it deals with default set ups for your practice, such as: show diagnosis from prior visit, maintain one or two patient balances, plus other programmer functions.
The System Management Menu includes the following options:
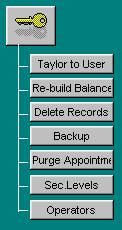
I. Tailor System to User
II. Rebuild Patient Balance
III. Delete Records
IV. Backup Define Operator Descriptions
V. Purge Appointments
VI. Sec. Levels
VII. Operators
Figure H.1
Note: Some of the fore disclosed the regular user, in case of modifications requiring their implementation please contact Budget Computer Systems, Inc., for Authorization and consideration, will never access functions. Therefore, some of the features hereby would be vaguely explained as the intent of this manual is to be user friendly and functional without need for extensive Computer literacy.
I. Tailor System to User
This section is where the various defaults (features most frequently used by your office) are specified to the system. This is done such that the system automatically assumes the conditions herein specified, unless these are otherwise altered or overridden by the operator. Some of the conditions hereby established are:
Physician code, type of routing slip utilized by the office, whether or not Medicare electronic transmission is required, maintain one or two balances per patient account, questions during transaction posting, etc...
Once in the Tailor Management Screen there will be eight tabs with information needed to set the system defaults. By clicking on the different tabs with your mouse you can access the different pages. The fields therein covered are as follows:
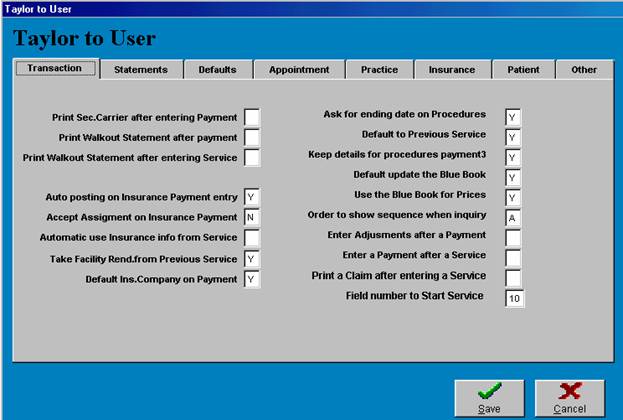
Figure H.2
Transaction
In this section you will have fields to enter defaults regarding transaction related functions of the package. You can set defaults regarding printing out Sec. Carrier, Walk out statement, Claim from and Statement after performing certain transactions.. You can set defaults regarding facility rendered Payment entry, sequence numbers, keep details and other fields regarding transactions related functions. These fields are self-explanatory, if at any time you do not understand what a field is requiring you to do, you can hit the f1 help key for further information on this fields.
Statements
In this section you will have fields to enter defaults regarding statement related functions of the package. You can set defaults here regarding number of times to bill procedure, show activity on statements, statement based on patient balance, based on payment, message for previous balance number of copies, statement form to use etc¼ All these fields are self-explanatory and do not require further explanation but if you need further explanation you can use the F1 help key to further assist you in these areas.
Defaults
This section of the package set automatic defaults in certain areas of the package. The following fields when information is entered the system will automatically display this information in the appropriate fields. Place of service, Adjustment Code, Classification, Medicare Disallowance, Reduction Adjustment Code, Medicare Code and Physician code. All these fields have drop down arrow available to click on in the event that you do not remember the appropriate code to enter in this field. When you click on the drop down arrow a window will pop up with a list of codes you have entered for this category. These fields are self-explanatory, if at any time you do not understand what a field is requiring you to do, you can hit the f1 help key for further information on this fields.
Appointment
This section of Tailor to User gives you the ability to customize information regarding your practices appointment book. You will be able to set information regarding Hours to start appointments, minutes between appointments, appointments allowed per day, number of rooms, and confirm time on multiple appointments. Once these specifications are set the system will not allow you to enter anything other than the specifications said here. All these fields are self-explanatory and do not require further explanation but if you need further explanation you can use the F1 help key to further assist you in these areas.
Practice
In this section of the package you will be able to enter your practice information. The information available to you in this tab are the following: Starting and ending date for fiscal year, G/L posting type, type of practice and keep counts for treatments. All these fields are self-explanatory and do not require further explanation but if you need further explanation you can use the F1 help key to further assist you in these areas.
Insurance
In this section of the medical program you can enter a large amount of information regarding the insurance. Here you enter Authorization Messages Claims Summary, Send sequence number, Inquiry letters and lots of other information. Depending on the way your practice is set-up and running you will enter the information here. All these fields are self-explanatory and do not require further explanation but if you need further explanation you can use the F1 help key to further assist you in these areas.
Patient
This tab of Tailor to User is to set certain defaults regarding patient information. It allows you to tailor information like Showing detail on patient ledger, label information, referrals, due dates etc¼. These fields are self-explanatory, if at any time you do not understand what a field is requiring you to do, you can hit the f1 help key for further information on this fields.
Other
This tab is set for miscellaneous information in the program. Here you can set the system password, word processing, displaying codes by code or description, warning when backup need to be performed etc¼ All these fields are self-explanatory and do not require further explanation but if you need further explanation you can use the F1 help key to further assist you in these areas.
In all these fields, click on the save button on each tab after storing information to personalize your practice to your liking. The questions are self-explanatory in all these tabs. Although it is recommended that you consult with a representative of Budget Computer Systems Software Support department prior to changing any defaults in the "Tailor System to User" section of the system
II. Rebuild Patient Balance
This function of the package re-calculates each or all of patient’s balances based on all the services and payments made for this patient. When you click on this icon in the System Management section of the program the system will bring up a window asking you to enter either one patient Id or enter ALL if you want to rebuild patient for all of your patients, enter here your choice. The next field is used for practices that use the split procedure option the package, if this is true enter here “Y” if you want to rebuild the patient balances by procedure as well. Enter OK to perform this task of rebuilding patient balances. If you no longer want to continue with this task click on the cancel button and the program will take you back to the main screen of the program.
III. Delete Records
This section of the package allows for the deletion of services, payments, adjustments, or patient demographics entered into the system's data files. Remember that once a patient file and/or transaction have been deleted there exists no reference to it. Therefore, you must first confirm that indeed that is the information your office wishes to delete.
After clicking on “Delete Records” in the System Management Section of the program, the menu herein looks as follows:
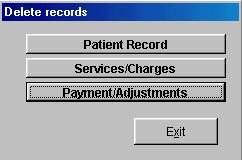 |
A. Patient record
B. Service/Charges
C. Payment/Adjustments
Figure H.3
Lets start with the following function;
A. DELETE PATIENT RECORD
This section allows for the deletion of an individual patient's record from the system. In order for a patient record to be deleted it should have a balance of 0.00. Thus, if you want to delete any patient record, which has a pending balance, said it should be written-off prior to deletion. It you have not done this when you delete the patient record the system will ask you if you want to delete services or payments for this patient, answer yes or no accordingly.
Once you have accessed this section the system will prompt you to enter the Id number, which corresponds, to the patient account you want to delete, once you enter it press enter. If you do not know the ID# number, simply pull up the name through the search method previously described in this manual. The system will then bring up the patient record you wish to delete and confirm whether indeed that is the patient you want to delete, click on Delete if this is the record you want to remove from the system otherwise click on cancel.
B. DELETE SERVICE/CHARGES RECORD
This sections provides for the deletion of a service entered. To do this the system will prompt for the patients ID number assigned. If you do not know the ID# number, simply pull up the name search method previously described in this manual.
C. DELETE PAYMENT/ADJ. RECORD
This entry allows for the deletion of any payment or adjustment posted to an individual patient account. In order to delete, in either case, the system will prompt for the ID# number which corresponds to transaction you wish to delete. To find out the appropriate ID# number for that transaction request the name search method previously described in this manual
IV. BACKUP PROCESSING
The Daily Backup function of your system is as important as the work you do everyday with your computer. When you do the Backup of your system you are storing the information (DATA) in a media that will assure that if anything goes wrong with your primary place of storage (The Hard Drive) there is another place in which it is kept. For example if your system is stolen or it is damaged, you are assured that all your work is not lost. This is why doing a daily backup of your system daily is of the essence. The backup of your system is done by first click on the icon that reads ”Backup” in the System Management column of the package. Once you have done this the Select Directory window will pop up on the screen. First select the desired drive you which to cave your data in. This depends on what drives are available in your windows system. Once you have chosen the appropriate drive then choose the appropriate folder to place you r back up in. To proceed with your back-up click on select. This system will ask you if you are sure you want to continue, answer yes or No accordingly. After clicking on Yes the system will warn you that no other users can be logged on during backup. If someone is using the package he or she need to get out of the program to be able to execute your back up. Click on Yes to begin the Back-up process. You will see a window pop-up during back up that will let you know the progress of your back up , until it reaches 100%.
Note: The system display on the main screen of the program the date of the last successful backup. This is normally displayed in the color black. When the system has not been backed up for mare than two days, the system will warn you by turning this display into RED.
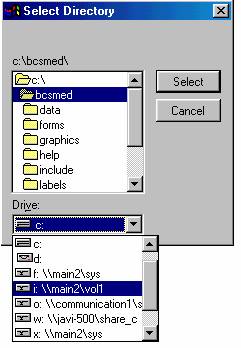
Figure H.4
We have been talking about how important it is to have a backup of your system in case of emergencies. We do not mean to scare you by that. The reason we stress backup is exclusively as a preventive measure. In the same fashion that you stress periodic physical exams to your patients to detect diseases while still treatable. By having reliable backup copies, when the unfortunate time arises, if ever the case, you would be ready to face it. In which event once the condition has been remedied, your data would be restored, and everything would be easily taken care without your office loosing important and valuable information.
V. Purge Past Appointments
To access this function. Click on the button that reads “Purge Appointments” in the System Management column of the program. The system will bring up a window that will ask you for the final date to purge appointments for. This is a self-formatting field , therefore the system will place the dashes need to separate the month/day /year.
WARNING: This option will delete all appointment information entered through the date hereby specified. Remember, that once the appointment information data has been deleted, there is no way of recovering said. Therefore, be very sure that indeed your office wishes to delete or purge all appointment information as of the date you have entered.
NOTE: Before running any purge functions it is highly recommended that a complete system backup be performed. This way, if something happens while the requested purge is being executed, you will be able to recover the information from the backup media.
VI. Define Security Levels
In this section, if your office uses password control, you will assign the level of security required to have access to the various functions of the package. Once you have requested this menu, by click on the icon that reads “Sec Levels” in the system management section of the package, the system will prompt by definition for each function within the system, for you to enter its appropriate security clearance level.
The security level may be any number from 0-99. The number assigned to each function depends on your office set up. Remember that any user with security level below the level marked hereby per function, will be denied access to those functions.
VII. Define Operator Restrictions
This is the section you will use, should your office be interested in setting up password control, to establish the various operator passwords, and their restrictions. To access this function click on the button that reads “Operator” in the System Management section of the package. Once you have done this you will have to tabs available. The List tab and the Edit tab.
Edit operators
Enter here to either add a new operator or change the restrictions for an existing operator or user password. To add a code once you clicked on edit, choose the add button and enter the needed information that is further described below. If you want to delete or edit a record find the code on the list tab, highlight it and then click on the edit tab and do the editing or deleting necessary. You will have the following fields to enter or edit information for:
Code
Enter the name or user code you want to assign to that user.
Name
Self-explanatory. Enter here the name of the operator for which this code has been assigned.
Password
Enter here the operator's security password. This password should not be released to others as they will then have access to the system under her login or security code. The password assigned hereby should be something easy to remember.
Sec. Level
The security level may be any number from 0 to 99. The higher the number the more access to functions within the system that the operator will have.
The security level works as follows: Each function on the system may be assigned a security level (0-99). If an operator has a security level equal or higher than has been assigned to a function, access
will be granted. Otherwise, if the operator's security level is below that assigned to the function, the operator will be denied access and the following message will appear: You are not authorized to run this function.
SUMMARY
We have now completed covering the System Management section of the system. As you will have noticed the title of this section is very useful as you can manage the functions of the system, by making special changes in this area. Although this area, with proper setup, can be the major factor in the success of your system, it can also be disastrous. As you have seen throughout the system, there have been many warnings as to certain sections that can have major affects on your data. Once again it is strongly recommended that any of the functions of the system management section of the system be executed under special supervision from Budget Computer Systems, Inc. Remember there are also certain circumstances in which you will not need supervision, such as the simple deletion of an incorrectly entered Service, Patient, Payment or Adjustment. We leave this to the discretion of the user.