SYSTEM REPORT
INFORMATION
Introduction
The system
offers a large variety of reports to better analyze and audit trail your
practice. There are reports like daily production reports that allow you to
see the production of your practice on a daily basis. This kind of a report will
also allow you to audit the daily entries to your system, balance your deposit
books and keep track of how much money is being deposited into various bank
accounts. You will have the ability to request reports of A/R with aging, and
A/R reports for primary and secondary insurance companies that will give you an
individual aging of all the claims that are unpaid in your system, by insurance
company for better collection follow up. Also you will be able to get listing
of new patients that have come into your practice for a certain period of
time. You can also print labels for the purpose of mailing or to put on your
patient folders. These are just a few of the reporting functions that you can
acquire from your system.
The report
section is basically the system's way of communicating with you, and giving you
important information, which would otherwise be impossible to compile,
accurately and quickly. The reports offered by the system, when properly used,
will give you better management capabilities and ways to quickly and without
straining yourself better audit trail the practice for purposes of billing,
collections, and future planning.
Lets go over
the reports in your system.
The reporting
section of your system is on the main screen of the program under the icon that
reads Reports. You will have the following report options to choose from:
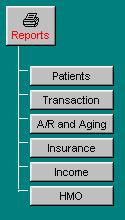 I.
Patients
I.
Patients
II. Transaction
III. A/R and Aging
IV. Insurance
V. Income
VI. HMO Reports
Figure
I.1
Whenever you
select one of these reports the system will ask you various questions from
which the system will base its selection to print the requested report from.
All the reports will ask you a set of standard questions, along with maybe one
or two special questions that refer to the output of the specific report. Lets
go over the standard questions that will appear when requesting all the
reports. (The questions that pertain strictly to each section will be covered
in their respective section).
Enter Starting
Date
Self-explanatory.
This is a self-formatting, date field, which is prompting for the starting date
of the period of time for which you want to print this report for. EX. You wish
to select information from 5/5/1989 through 5/10/1989. Your entry here will
be: 05051989.
Enter Ending
Date
Self-explanatory.
This is a self-formatting date field, which is prompting for the ending date of
the period of time for which you are requesting the reports to be printed for.
EX. You want to select all transactions with an effective posting date
ranging from 5/5/1989 through 5/10/1989. Your entry here will be:
ENTRY:
05101989
Classifications
to Include
If you wish to
execute the requested function for all patient classifications simply skip over
this field by pressing return. Otherwise, in the event that you would like to
execute this function for an specific class, or classes of patients, enter here
the applicable internal patient classification codes, separated by commas.
Example: You
want to execute this function only for all of your Private Insurance and
Relative patients. The internal system codes are: PRIV, and REL,
respectively.
ENTRY:
PRIV,REL
Classifications
to Exclude
If you wish to
execute this function for all of your patients regardless of their
classification, simply press return. However, in the event that you want to
execute this function for all of your patients, except one or several patient
classifications, then enter here the internal system code that corresponds to
the patient classifications you wish to exclude.
Example: You
wish to exclude from this function all those patients whose classification is
FRIEND.
ENTRY. FRIEND
Physician
to Include
The next
prompt, Physicians to Include, can be used to print reports for patients seen
by certain physicians, not all. That is, the system will only print out
information for patients with specified physician. In the event that your
office wants to print reports for all patients; regardless of their physician
simply skip over this field leaving it blank. If at this time you do not
remember the physician needed at this moment, you can click on the drop down
arrow in this field for a list of your internal codes for this physician.
Enter Carriers To Include
If you wish to
print reports only for one insurance company, then you may do so by entering
the appropriate insurance company code in this field. “Carriers to
Include”, can be used to print reports for patients with certain carriers, not
all. In the event that your office want to print reports for all patients;
regardless of their carriers simply skip over this field leaving it blank. If
at this time you do not remember the carrier needed at this moment, you can
click on the drop down arrow in this field for a list of your internal codes
for the carriers.
Note : These
six fields require entry according to what information you want in your
reports. In most every report that you will request to be printed, the system
will prompt you with the six fields explained above. We will now go over fields
different from the above mentioned in each report.
Note: Once you
have clicked on the okay button the window of the report you are requesting,
the system will bring up the report you requested on your screen, a preview,
from here you can choose to print the report. This option is located on the
toll bar of your preview. You can choose to close this window if you do not
wish to print this report.
Lets go over
each section individually. It is only appropriate that we start by “
Patients" since it is the first one in the section.
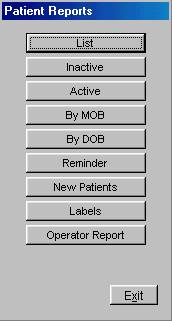
I. Patients
To go into Patient Reports click on the
button that reads “Patients” from the reports column on the main screen of the
program. The following are a list of reports that you have the option to choose
from:
A. List
B. Inactive
C. Active
D. By MOB
E. By DOB
F. Reminder
G. New Patients
H. Labels
I. Operator Report
Figure
I.2
Lets go over
what each report contains other than those fields previously described above.
To see a listing of each report refer to the Sample Reports section of this
manual.
A. List of
Patients
This report
will give you a listing of the patients in your practice. You will have the
ability to request the report by patient classification, and/or for a specific
physician or carrier. When you enter this section of the package the system
will ask you the standard questions (these were previously explained above)
from which the system will base its selection. This report will allow you to
see which patients make up the volume of your practice. Also, for example if
you wish to send letters to patients within a certain classification then you
can have the system print you a list of the patients so you can send letters
based on the printout.
B. Inactive
This report
will give you a list of patients that have not been to your practice for a
certain period of time as specified by the user. When you enter this section
the system will ask you the standard questions from which it will base its
selection on (previously explained above) , then the system will ask you the
following:
How many
months Inactive?
Enter here how
many months a patient must have been inactive in order for the system to print
them on your report. For example if you want patients that have been inactive
for more than 18 months, your entry here should be the following: ENTRY:
18
Once you have
completed answering the questions for the selection criteria the system will
begin printing a list of all the patients that match the criteria specified for
selection. This report can be very useful to track patients that neglect to
come back for periodic check ups. You can send patients that have not been to
your practice in a long period of time letters, explaining to them that they
should come in for regular attention. Or you might want to send them a news
letter that says, that there is an epidemic and they should be vaccinated, or
any kind of letter that will help the patient in assuring that their health is
well maintained, which in turn will bring more patients in to your practice,
and consequently more revenue.
C. Active
This report
will give you a list of patients that have been to your practice as of a
certain period of time as specified by the user. When you enter this section
the system will ask you the standard questions from which it will base its
selection on, (previously explained above) then the system will ask you the
following:
How many
months active?
Enter here the
number of months since a patient has been to your practice in order for the
patient to be considered as active in order for the system to print them on
your report. For example if you want patients that have been active during the
past ten months, then your entry here should be should be the following: ENTRY:
10
Once you have
completed answering the questions for the selection criteria the system will
begin printing a list of all the patients that match the criteria specified for
selection. This report can be very useful to track patients who remain active
in your practice, for analytical or managerial reasons. You can send patients
that have remained active with your practice, letters thanking them for
entrusting their health in your practice.
D. By MOB (report of birthdays by
month of birth)
This report
can be used to get a listing of patients that have birthdays within a certain
month of the year, as specified by the user. You can use this report to send
your patients Birthday cards, or gifts. When you go into this section the
system will ask you the standard questions (previously explained above) from
which the system will base its selection of patients from, and then the system
will ask you the following questions, which pertain to this report:
Starting Month
Enter here the
starting month for the patient’s birthday that you wish to select. For example
if you wish to select patients whose patients range from the month of June
through the month of July then you entry here should be; ENTRY: 06
Ending Month
Enter here the
ending month for the patient birthday that you wish to select. For example if
you wish to select for patients whose birthdays range form the month of June
through the month of July, then your entry here should be the following; ENTRY:
07
E. By DOB (report of birthdays by date
of birth)
This report
can be used to get a listing of patients that have birthdays within a certain
date of the year, as specified by the user. You can use this report to send
your patients Birthday cards, or gifts. When you go into this section the
system will ask you the standard questions (previously explained above) from
which the system will base its selection of patients from, and then the system
will ask you the following questions, which pertain to this report:
Starting Date
Enter here the
starting date for the patients birthday that you wish to select. For example
if you wish to select patients whose patients range from the date of June 01 1998
through the date of July 01 1998 then you entry here should be; ENTRY:
06011998 Remember, this is a self formatting date field so you do not need
to enter the slash (/) between the month/day/year.
Ending Date
Enter here the
ending date and day for the patient birthday that you wish to select. For
example if you wish to select patients whose patients range from the date of
June 01 1998 through the date of July 01 1998 then you entry here should be; ENTRY:
07011998 Remember, this is a self formatting date field so you do not need
to enter the slash (/) between the month/day/year.
Now the system
will begin printing a list of all the patient that match the criteria that you
specified for selection. From this list you can send birthday cards or call
your patients and wish them happy birthday or anything that you can imagine.
This function will help you to market your practice as your patients will see
that you care for them and remember them on their special day.
F. Reminder
This report
will give you a listing of all the patients that have a reminder as of a
certain date specified by the user. This report works in conjunction with the
Patient reminder function of the system. When you enter this section the
system will ask you the standard questions for every section, (previously
explained above) and then it will ask you the following;
Reminders
through what date?
Enter here the
through date of affectivity for patient reminders that you want the system to
print the report for. For example, if you want a list of patients with
reminders pending that the effective date of the reminders is no further than
November 30, 1990 then your entry here should be the following: ENTRY:
11301990 This is a self formatting date field, meaning that you do not need
to enter the slashes (/) to separate the month/ day/year.
After you have
completed answering all the questions from which the system will base its
selection on, then the system will begin searching for patients that match the
selection criteria, and print the report. This report will assist you in
keeping track of any reminders that you have for your patients, to assure that
anything that you had to do regarding that patient is done promptly and when
due. It may be used to store medical reminders, such as: Remembrance of lab
results, as well as collection reminders. Anything which is important for your
office to act upon properly and immediately when due.
G. New Patient
This report
will give you a listing of patients that have come in for the first time within
a certain range of dates as specified herewith by the user. This report can be
used to analyze the number of new patients that have come into your practice
during a specified period of time, may be compare the same period to the prior
year, to analyze office performance and perhaps marketing techniques. This
report is also useful to easily send special letters or cards to new patients
welcoming them to the practice. This is a good marketing, rapport, and
function. When you enter this section, the system will ask you the standard
questions of every section, (previously explained above) from which the system
will base its selection. Once you have completed answering the questions for
selection then the system will begin to print the report displaying all the
patients that came in for the first time within the range of dates specified,
and whom match the selection criteria. This report will be a good tool in the
analysis of new patient income to your practice, and what times of the year do
you see more new patients.
H. Patient Labels
This function
will allow you to print labels for the patients in your practice. These labels
will contain the patients ID#, Name, and address. It is recommended that you
purchase continuous form labels that are 4 x 15/16 in size, and no more than
two labels across the page. We recommend hat you use Avery 5061. When you go
into this section the system will ask you the standard questions (previously
explained above) from which the system will base its selection of patients
from, and then the system will ask you the following questions, which pertain
to this report:
Starting Month
Enter here the
starting date of birth month for the patients that you wish to print labels
for. For example if you wish to select patients that patients range from the
month of June through the month of July then you entry here should be; ENTRY:
06
Ending Month
Enter here the
ending date of birth month for the patient you wish to print labels for. For
example if you wish to select for patients whose birthdays range form the month
of June through the month of July, then your entry here should be the
following; ENTRY: 07
I. Operator Report
This report
will allow you to obtain a report showing the transactions that were entered by
each operator. Please note that this report will only detail which operators
made the entries if you are using the Security Password system of the program.
You can access this report to analyze the production of entry by each
employee. Also for audit trailing purposes this report can be used to analyze
what employee entered what information. To access this report the system will
ask you the standard questions of all reports, (previously explained above) and
then the following;
Operator to
Include
Enter here the
operator code, for which you want this report to print or leave blank for all.
If you do not remember the operator code you can click on the drop down arrow
located in this field for a list of your internal operator codes. The system
will now generate a production report for the above, specified criteria based
on the operators individual entries.
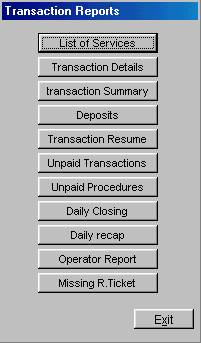
II.
Transaction Reports
A. List of
Services
B. Transaction Details
C. Transaction Summary
D. Deposit
E. Transaction Resume
F. Unpaid Transactions
G. Unpaid Procedure
H. Daily Closing
I. Daily Recap
J. Operator Report
K. Missing R. Ticket
Lets
go over each report:
Figure I.3
A. List of Services
This report is
self-explanatory. This report will allow you to show a list of services
rendered. When you get into this section the system will ask you a series of
standard questions (previously explained above) It will then ask you the
following:
Service Type to include
It allows you
to print out a list of services rendered For example, if you wish to show a
list of services that are marked as type "I" then your entry here
should be "I". If you wish to show a list of services that are
marked as type "C" then your entry here should be "S".
B. Transaction
Details
This report
will give you a printout of all the transactions that occurred in the system on
a specified date. You have the option to enter either a range of dates, to run
a periodic transaction report or the same starting and ending date to run a
daily transaction report. It is recommended that you print out this report on a
daily basis. The periodic transaction report output will be broken down by
dates. This report will give you a listing of each individual patient that had
a transaction posted that date, and a detail of each transaction to the
patients account, inclusive any Services, Payments, and/or Adjustments
entered. When they do not balance you can easily spot which check was posted
for the incorrect amount. At the end of the report the system will total every
type of transaction and then give you various totals including total payments
and a breakdown by type of payment (CASH, CHECK, CREDIT CARD etc...). This
report is a replacement to the traditional "PEGBOARD" system, it is
far more accurate and quicker, and the layout is more organized and formal.
When you enter this section to request this report the system will ask you the
standard questions of every section (previously explained above) and then the
following;
Service Type to include
It allows you
to print out a the transaction report including a certain type of service or
you can leave this field blank to include all service types. For example, if
you wish to show on the report services that are marked as type "I"
then your entry here should be "I". If you wish to show on the
report services that are marked as type "C" then your entry here
should be "S".
C. Transaction Summary
This report
will give you the same output as the daily or periodic transaction report but
it will be in summary form. It will not have a detail on each patient’s
transactions, but rather it simply provides totals for each patient. It is
suggested that you print both the regular transaction report and the summarized
one in order to decide which one is more useful and efficient for your
practice. In this report as well you have the option to print out the report
for a day by entering the same starting and ending date or for a period of time
by entering the range of dates you want this summary to print out for. For the
periodic summary, the output of the report will be broken down by dates. It is
recommended that you print both the periodic transaction report and summary and
decide which one is more efficient to your practice. The majority of the
offices usually print the daily transaction report in detail, and at the end of
month they request a periodic transaction summary report for the month in order
to do the end of month recaps. When you enter this section to request this
report the system will ask you the standard questions of every section
(previously explained above) and then the following;
Service Type to include
It allows you
to print out a the transaction report including a certain type of service or
you can leave this field blank to include all service types. For example, if
you wish to show on the report services that are marked as type "I"
then your entry here should be "I". If you wish to show on the
report services that are marked as type "C" then your entry here
should be "S".
D. Deposit
You have the
option as well in this report , to run it for a specific day, or arrange of
days, Daily vs. Periodic. It will detail by day all the deposits, for the range
of dates that you specify, broken down by bank account. Daily: This report will
give you a list of the checks posted and their corresponding bank account as
entered in the payment posting. This report can be used to balance your daily
deposit book. To assure that all checks are posted and that none are lost or
deposited un-posted. Periodic: This report can be used to balance your deposits
for periods of time. It will assure that all the checks that you are
depositing are posted into the patient accounts. When you enter this section
the system will ask you the standard questions of every section but the first
question in this section is the following;
Include Patient Details
If you would
like to see the detail of the deposit, then enter “Y”, in this field. This
will bring the patient name and sequence that was applied to , otherwise, you
may answer “N”, just to see the totals.
This report
should be printed periodically to assure that the entries in the system balance
with what you are depositing into your bank accounts. This is a good feature
to audit trail your practice. You can even take this report and balance it
against the daily transaction report to assure that there were no checks
entered without specifying the bank account, which will also assure that all
your checks are posted and will help you in the security of the money in your
practice.
E. Transaction Resume
This report can be very useful to
your practice. It gives you a report of transaction separated by month. For
each month it gives all services, payments, debit adjustment and credit
adjustments. At the end of each month it gives you totals for these transaction
as well. It is recommended that this report be printed periodically to keep
track of the distribution of monies in your office. When you enter
this section to request this report the system will ask you the standard
questions of every section (previously explained above) and then the following;
Service Type to include
It allows you
to print out a the transaction report including a certain type of service or
you can leave this field blank to include all service types. For example, if
you wish to show on the report services that are marked as type "I"
then your entry here should be "I". If you wish to show on the
report services that are marked as type "C" then your entry here
should be "S".
F. Unpaid
transaction report
This report
will give you a listing of any transactions, of any type that are un-paid,
based on your selection criteria. This report can be used to analyze, which
transactions in your system remain un-paid, and open without any response or
payment. The system will ask you for the standard report questions, (previously
explained above) and then the following;
Service type
to include
Enter here the
type of transaction to print this report for. For example to print this report
to get a list of unpaid cash transaction, enter "C". For a list of
insurance transactions enter "I" etc...
Minimum
Balance
Enter here the
minimum balance that a patient must have on their account in order for their
unpaid transaction to show on this report. For example if you want only
patients with a balance of $10.00, or more, to show on this report then enter
here "10".
Once you have
completed the above questions the system will then proceed to search for the
matching information and print your report.
G. Unpaid
Procedure Report
This report
will only be functional if you are using the line item posting method in your
system. This report is the same as the unpaid transaction report, but it
details within a transaction which procedures are unpaid. The system will
ask you the standard report questions (previously explained above) and then the
following;
Service type
to include
Enter here the
type of transaction to print this report for. For example to print this report
to get a list of unpaid cash transaction, enter "C". For a list of
insurance transactions enter "I" etc... If you want to print all
leave this field blank. This report bases its output on the completion flag.
The report will denote all those services, matching the selection criteria,
whose completion flag is "N".
Minimum
Balance
Enter here the
minimum balance that a patient must have on their account in order for their
unpaid transaction to show on this report. For example if you want only
patients with a balance of $10.00, or more, to show on this report then enter
here "10".
H. Daily Closing
The daily closing report
is very beneficial for your practice operation. It allows you to see totals of
payments. Services, Adjustments + or -, total patients seen, It will divide
this report in Today totals, This month totals and year to date totals. It also
gives you the number of patients with balances. It gives you total credit and
debit amounts and the average balance per patient. Once in this section you
have the option to choose which physician to include (previously explained) and
it will ask you if you want to detail totals, if you answer Yes to this prompt
the system will bring up a detailed report including check, credit card and
cash payments, unknown payments, services billed etc…..
I. Daily Recap
This report will display
a summary of total activity in your practice for the day you choose . Once in
this section after answering standard questions (previously explained above)
the system will ask you the following:
Show Ref. Numbers
If you wish
to show the reference numbers that you entered while posting payments then
answer “Y” for Yes otherwise, answer “N” for no.
Show Amount
If you wish
to show the amount on this report answer “Y” for yes otherwise answer “N” for
no.
J. Operator Report
This report
will allow you to obtain a report showing the transactions that were entered by
each operator. Please note that this report will only detail which operators
made the entries if you are using the Security Password system of the program.
You can access this report to analyze the production of entry by each
employee. Also for audit trailing purposes this report can be used to analyze
what employee entered what information. To access this report the system will
ask you the standard questions of all reports, (previously explained above) and
then the following;
Operator to
Include
Enter here the
operator code, for which you want this report to print or leave blank for all.
If you do not remember the operator code you can click on the drop down arrow
located in this field for a list of your internal operator codes. The system
will now generate a production report for the above, specified criteria based
on the operators individual entries.
K. Missing
Routing Slips Report
This report
will give you a listing of the status of your routing slips. This report will
assist you in assuring that all routing tickets are entered in the system. The
system will display the status of each routing ticket number (For example it
could have a status of "MISSING"). Every routing ticket in the
system will have a number, which will be entered in the service entry screen
when posting services. This report can be requested for a range of routing
ticket numbers. This report should usually be printed on a weekly basis (Or
daily, or monthly however manner seems more effective for you), and lets say
that on this week you used routing tickets 1 to 125, then you would request
this report for tickets 1 to 125. When you enter this section to request this
report the system will ask you the following;
Starting
Ticket Number
Enter here the
beginning slip number for the range of slip numbers that you want to request
this report for. For example, if you want this report for slips numbered 1
through 125 then your entry here should be the following: ENTRY: 1
Ending Ticket
Number
Enter here the
ending slip number for the range of slip numbers that you want this report
for. For example if you want to request this report for slips numbered 1
through 125 then your entry here should be the following; ENTRY: 125
From here you
can determine if a routing ticket number was not posted. Many times a routing
ticket can be left in an examination room or filed away without posting, or
even accidentally be thrown away. This report will help you track these
problems, to make sure that your office promptly bills and collects on all
services rendered.
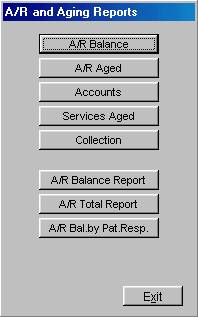
III. A/R and Aging
The reports in
this section are primarily to keep track of the account receivables and assist you
in the collection of funds through various types of reports. When you click on
the “A/R and Aging” button the system will display the following menu, which
denotes the different types of reports that you can print.
A. A/R
Balance Figure I.4
B. A/R Aged
C. Accounts
D. Service Aged
E. Collection
F. A/R Balance Report
G. A/R Totals report
H. A/R Bal. by Pat. Resp.
Lets go over
each report:
A. A/R Balance
This report
will give you a listing of the patients in your practice along with their ID#,
Classification, Address, telephone number, and the balance of their account.
This report can be selected for a range of patient ID#'s, and also including or
excluding some patient classifications. When you go into this section the
system will ask you the standard questions of every section. From the answers
that you specify herewith the system will print the report. This report can be
used to call patients notifying them of their balance since the report contains
addresses, and telephone numbers, you do not have to search through patient
files looking for the information. It is a proven fact that telephone
collections are a good tactic in collecting funds. Remember your practice is a
place for the care of the health of others, but it is also a business, and like
all businesses you are entitled to collect the funds for the services that you
have rendered. This report in order to choose the criteria for your information
will ask you a series of standard question as previously described above.
B. A/R Aged
This report
will give you a breakdown of the aging of the individual patient accounts as
selected by the user. The report will break down the balances of the patients
into 30-day periods depending on the number of days overdue that you specified,
for example(0-29 days overdue 30-59, 60-89, 90-119, 120-149, 150 +). Refer to
page 12-27 for an example of this report. When you enter this section the
system will ask you the standard questions of every section, (previously
explained above) then the following;
Minimum
Balance
Enter here the
minimum balance that a patient must have on their account in order for their
unpaid transaction to show on this report. For example if you want only
patients with a balance of $10.00, or more, to show on this report then enter
here "10".
Service type
to include
Enter here the
type of transaction to print this report for. For example to print this report
to get a list of unpaid cash transaction, enter "C". For a list of
insurance transactions enter "I" etc... If you want to print all
leave this field blank. This report bases its output on the completion flag.
The report will denote all those services, matching the selection criteria,
whose completion flag is "N".
Check Primary or Secondary Carrier
Enter here “P
“if you want the system to check for Primary carrier or enter S if you want the
system to check for “S” secondary carrier.
C. Accounts
This
report gives you the option to print out a report that list deposits into an
account chosen by the user. After entering this area and answering the standard
questions of every section the system will ask you:
Account to
Include:
Enter here the
account that you wish the system to print the report for. If you do no remember
the account at this time, click on the drop down arrow in this field for a list
of your internal codes to choose from.
D. Service Aged
The purpose of
this report is to allow you to view the services rendered by procedure. It
shows a listing of the services and their aging i.e. current, over 30, over 60
over 90. After answering the standard question of each section the system will
prepare information for your report.
E. Collection
Report
This report
can be used to get a listing of patients who have a balance overdue more than a
specified number of days. This report can be used to send to a collection
agency, because it contains any information that the agency might need in order
to follow up its collection. You can also use this report to call these
patients whose balances are overdue more than a specified number of days, and
warn them that if the due balance is not paid by such date, the matter would be
turned over to a collection agency. The report will display all the service
dates rendered to the patient and the status of the balance. It will even show
if there was any payment, and the balance after the payment. When you enter
this section to request the report the system will ask you the standard
questions of every section and then it will ask you the following;
Number of Days Overdue
Enter here the
number of days that a service date must be overdue in order for it to be
printed on this report. For example, if you want the services that are overdue
one hundred and fifty days, then your entry here should be the following; ENTRY:
150
After you have
completed the selection criteria questions the system will then prepare the
report for all the patients that fall within the selection criteria and whose
balances are overdue by at least the minimum number of days specified herewith
by the user.
Note: The following three reports will
ask you for starting and ending Id # Enter here the range of Ids that you want
the reports to be printed out for. If you want the report to be printed out for
all Id #’s leave this field blank. In the event that you want only one id
enter the same starting and ending Id.
F. A/R Balance Report
This report is
like the first balance report but you have more options to customize your
report.
This report
can be selected for a range of patient ID#'s, and also including or excluding
some patient classifications. When you go into this section the system will ask
you the standard questions of every section. It will then ask you the
following:
Sort by Id,
Class or Name
Enter
here how you want the system to sort the information. Enter “I” for Id, “C” for
class or “N” for name.
Include
Patient Details
Self-Explanatory.
Enter here “Y” for yes if you want to include patient detail on the report,
otherwise enter “N” for No.
Show Overdue From Pay or Srv
Self-Explanatory.
Enter here “P” to show overdue from payment or “S” to show overdue from
Service.
Starting and Ending Overdue Days
Self-Explanatory.
Enter here the starting and ending overdue days for the report.
G. A/R Totals
Report
This report
will give you the totals of the accounts receivables in your practice. This
report can be used to analyze if the account receivables in your practice is
rising, which in turn is worse meaning that more money is owed to you, or it is
getting lower which could mean that the collections of your practice is getting
better. The system will go through all the information in your practice and
add it up and give you a total of the A/R in your practice. When you enter
this section to request this report the system will ask you the standard
questions of every section from which the system will base its output on. The
questions under class are enabled because you do not need to specify this information
for this report. Once the system is finished calculating the A/R then the
system will display the totals showing you the monies that are outstanding in
your practice. If there are any monies that you owe to patients the system
will also display that, and it will offset the total amount of the A/R total.
It is
recommended that you balance your accounts receivables periodically. Some
offices prefer to do this daily, weekly, or monthly. The period is not
important as long that it is done. Balancing A/R is a must to the security of
your practice, to make sure posting once entered are not getting lost or
altered in any way. This report was designed to specifically assist you in
this regard.
The system has
the ability to maintain two balances per patient account. One balance for the
insurance and one balance for the patient's responsibility. If you maintain
two balances in your system the following reports will be available.
H. A/R Bal. by
Pat Resp.
This report
will give you a listing of patients along with their address, phone number and
patient responsibility balance. This report is the same as the report "A/R
balance report" except that the balances displayed are the patient
responsibility balances that are kept when your system is set up to maintain
two balances. The two balance system is an option in the software and can be
used depending on the necessity of your practice. For information on how to set
up your system to maintain two balances, refer to the System Management section
of this manual, specifically tailor system to user.
When you go
into this section the system will ask you the standard questions of every
section. It will then ask you the following:
Sort by Id,
Class or Name
Enter
here how you want the system to sort the information. Enter “I” for Id, “C” for
class or “N” for name.
D. Insurance
Reports
The reports in
this section have all been developed to give you a better, easier, faster
method to track your insurance claims, and set up better insurance collection
and billing systems. The reports in this section include accounts receivables
reports by primary and secondary insurance, list of patients by insurance
companies, and unbilled insurance reports both, for primary and secondary
insurance companies. When you enter this section the system will display the
following menu of reports that you may select from.
Figure I.5
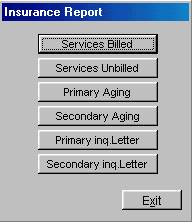 A. Services Billed
B. Services
Unbilled
C. Primary
Aging
D. Secondary
Aging
E. Primary
Inq. Letter
F. Secondary
Inq. Letter
Lets go over
the output of each report hereby offered. Lets begin with the following;
A. Services Billed
This report
will give you a listing of the services that have been submitted for payment to
the insurance companies. You have the option to include all services billed, or
specifically request those billed within a specific period of time. You can
also choose to check primary or secondary carrier. When you enter this section
to request this report the system will ask you the standard questions of every
section and the following special questions that exclusively relate to this
report:
Minimum
Balance
Enter here the
minimum balance that a patient must have on their account in order for their
unpaid transaction to show on this report. For example if you want only
patients with a balance of $10.00, or more, to show on this report then enter
here "10".
Service type
to include
Enter here the
type of transaction to print this report for. For example to print this report
to get a list of unpaid cash transaction, enter "C". For a list of
insurance transactions enter "I" etc... If you want to print all
leave this field blank. This report bases its output on the completion flag.
The report will denote all those services, matching the selection criteria,
whose completion flag is "N".
Check Primary or Secondary Carrier
Enter here “P
“if you want the system to check for Primary carrier or enter S if you want the
system to check for “S” secondary carrier.
B. Services Un-billed
This report
will give you a listing of the services that have been submitted for payment to
the insurance companies. You have the option to include all services un-billed,
or specifically request those un-billed within a specific period of time. You
can also choose to check primary or secondary carrier. When you enter this
section to request this report the system will ask you the standard questions
of every section and the following special questions that exclusively relate to
this report:
Minimum
Balance
Enter here the
minimum balance that a patient must have on their account in order for their
unpaid transaction to show on this report. For example if you want only
patients with a balance of $10.00, or more, to show on this report then enter
here "10".
Service type
to include
Enter here the
type of transaction to print this report for. For example to print this report
to get a list of unpaid cash transaction, enter "C". For a list of
insurance transactions enter "I" etc... If you want to print all
leave this field blank. This report bases its output on the completion flag.
The report will denote all those services, matching the selection criteria,
whose completion flag is "N".
Check Primary or Secondary Carrier
Enter here “P
“if you want the system to check for Primary carrier or enter S if you want the
system to check for “S” secondary carrier.
C. Primary Aging
This report
will give you an aging of the claims, which your office has already filed,
sorted by insurance company. Thus, it provides the total amount due to you per
insurance company, along with the respective aging. You have the capability to
instruct the system to show on the report only those claims that are more than
a specified number of days past due. This report includes a listing of all the
claims grouped by insurance company along with the insurance company name,
phone number, the day that the claim was submitted, the day that the services
were rendered, the number of days that it is overdue and the amounts overdue.
This report can be used to call the insurance companies to follow up on the
claims that have not been paid. This report could also help you audit trail
the payment entries in your system. For example, if you call an insurance
company and they say that they have issued a check to you, but it does not
appear in your system, then you can check if it was never posted, sent to the
wrong address, or posted to the wrong patient account. When you enter this
section to request this report the system will ask you the following questions.
Show Patient
Details
Self-Explanatory.
Enter here “Y” to show the detail patient information. Otherwise Enter “N” No.
Show Patient
Reminder
Self-Explanatory. Enter
here “Y” to show the patient reminder information. Otherwise Enter “N” No
Show Procedures Details
Self-Explanatory.
Enter here “Y” to show the detail, procedure information. Otherwise Enter “N”
No
Show Doctor
Details
Self-Explanatory
Enter here “Y” to show the doctor detail information. Otherwise Enter “N” No
Type of
Service to Print
Enter here the
type of transaction to print this report for. For example to print this report
to get a list of unpaid cash transaction, enter "C". For a list of
insurance transactions enter "I" etc... If you want to print all
leave this field blank. This report bases its output on the completion flag.
The report will denote all those services, matching the selection criteria,
whose completion flag is "N".
B. Ins. Aged A/R
Report (Sec.)
This report is
the same as the aged report for primary insurance, with the exception that it
is the aging for the secondary insurance companies. To select this report it
is the same process as selecting the report for the primary insurance. This
report will be very helpful for you to keep track of, and follow up on
secondary insurance claim payments When you enter this section to request this
report the system will ask you the following questions.
Show Patient
Details
Self-Explanatory.
Enter here “Y” to show the detail patient information. Otherwise Enter “N” No.
Show Patient
Reminder
Self-Explanatory. Enter
here “Y” to show the patient reminder information. Otherwise Enter “N” No
Show Procedures Details
Self-Explanatory.
Enter here “Y” to show the detail, procedure information. Otherwise Enter “N”
No
Show Doctor
Details
Self-Explanatory
Enter here “Y” to show the doctor detail information. Otherwise Enter “N” No
Type of
Service to Print
Enter here the
type of transaction to print this report for. For example to print this report
to get a list of unpaid cash transaction, enter "C". For a list of
insurance transactions enter "I" etc... If you want to print all
leave this field blank. This report bases its output on the completion flag.
The report will denote all those services, matching the selection criteria,
whose completion flag is "N".
E. Primary Inq. Letter
This function
of the system will allow you to print out inquiries letters for primary
insurances about the status of unpaid claims. There is a standard letter that
is already in your system. This system will allow you to specify for which
company you would like to send the inquiry letter and for claims overdue how
many days. These letters are very powerful collection tools as they automate
your collections of unpaid claims without the need of having employees call all
companies to follow up. This letter provides an area for the company to respond
as to the status of the claims. It is similar to having a collection agency
visit your company to find out about unpaid claims. The system will ask you
standard question as in every section, once answered the system will prepare
the letters for you.
F. Secondary Inq. Letter
This function
of the system will allow you to print out inquiries letters for secondary
insurances about the status of unpaid claims. There is a standard letter that
is already in your system. This system will allow you to specify for which
company you would like to send the inquiry letter and for claims overdue how
many days. These letters are very powerful collection tools as they automate
your collections of unpaid claims without the need of having employees call all
companies to follow up. This letter provides an area for the company to respond
as to the status of the claims. It is similar to having a collection agency
visit your company to find out about unpaid claims. The system will ask you
standard question as in every section, once answered the system will prepare
the letters for you.
E. Income Reports
When you enter
this section of the package the system will display a menu, refer to figure
11-6 for an example of the menu. The following is a list of the reports that
you can access.
Figure I.6
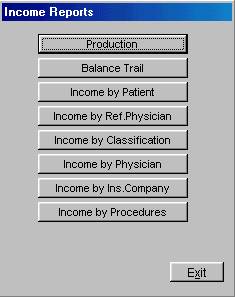 A. Production
B. Balance Trail
C. Income by Patient
D. Income by Ref. Physician
E. Income by Classification
F. Income by Physician
H. Income by Ins. Company
G. Income by Procedure
The reports in
this section are primarily to analyze the production of your practice, by
specific sections of the practice, and for any desired period of time. Lets
cover the output of the reports:
A. Production
This report can be very
useful to analyze the production of your practice. It displays the services,
payments, adjustment and balances per date separated by month. To access this
function click on the production button in the income reports window. After answering
the standard question of every section the system will also prompt you for the
following:
Starting &
Ending Date for Services
Self-Explanatory.
Enter here the Starting and Ending date of services for which you want the
system to run the report for. For example if you want the report to show
services from January 20, 2000 thru February 20, 2000 then enter 01202000 in
the first field, 02202000 in the second field.
Starting &
Ending Date for Payments
Self-Explanatory.
Enter here the Starting and Ending date of payments for which you want the
system to run the report for. For example if you want the report to show
payments from January 20, 2000 thru February 20, 2000 then enter 01202000 in
the first field, 02202000 in the second field.
Procedure to Include
Self-Explanatory. Enter
here the procedure you wish to include on you report. If you do not remember
the procedure code click on the drop down arrow in this field and choose the
appropriate code from your internal code listing.
Include days details
Self-Explanatory. If on
this report you wish to show days details, Enter “Y” yes here, Otherwise Enter
“N” no.
B. Balance Trail
This report is similar to
the production report, the diffrence is that it carries over the balance each
month and gives you a grand total. After entering the standard questions of
every section, The system will prompt you for the following:
Enter initial
date for thru :
Enter the
date that you want the system to carry over the balance from. This si a
self-formatting field, you do not need to enter the dashes to separate the
day/month/year, the system will place it automatically place the dashes for
you.
C. Income by Patient
This report is to show a
listing of monies received from each patient or a range of patients. After
answering the standard question of every section the system will prompt you for
the following:
Show service
detail:
Self-Explanatory. Enter
here “Y” yes if you want the report to show service details otherwise enter “N”
no.
D. Income by Ref.
Physician.
This report
will give you a list, sorted by referral source, of the patients that have come
to your practice by way of referral. In it you have the capability to include
the name of each patient referred, total services billed, payments received,
and total adjustments posted. This way, you can quickly analyze, where your
patients are coming from, and perhaps allow courtesies to those referrals that
submit good patients.
This report
can also help you analyze if the referrals that you are getting from certain
sources are really bringing in money, or not. For example, a doctor might be
referring patients to you who are not paying, and you are rendering services but
not getting paid for them. This type of referral might be damaging you instead
of helping you. Refer to page 12-36 for an example of this report. When you
enter this section to request this report the system will ask you the standard
questions of every section, then the following question will also appear.
Ref. Physician
to include:
Enter the
internal physician code, which corresponds, to the doctor for which you want
the requested statistical information. If your office does not want to
distinguish statistical information between doctors, simply leave this field
blank by pressing <ENTER>. For a list of all available physician codes
click on the drop down arrow located in this field and choose from a listing of
your internal codes for Referring physicians
Include
Details
Enter
"Y" if you want the report to be in detail. That is, for each and
every patient it will list the patient name for which each transaction took
place, and a detail of each transaction, rather than simply providing lump
totals. At times it might be best to request statistical reports without
detail, as the report, might take a substantial amount of pages. In order to
obtain the report without detail simply enter "N".
E. Income by
Classification
This report
will allow you to see the production of your practice for the period of time
requested, organized by patient classification or classifications entered, in
your system. This report can be used to analyze what patient classification is
bringing in the most money to your practice, or just to analyze what is the
difference in production between each patient classification. If when
selecting the output of this report you tell the system to give you detail of
transactions, the system will group into patient classifications all the
patients and the transactions that have occurred within each individual
account. This report can also be selected without detail, in which case the
system will just give you the totals of each patient classification. On
certain occasions, it might be best to request the report without detail due to
the fact that the printout on paper could be very lengthy. It is suggested
that you print the report both ways and then decide which format is more effective
and convenient for your practice to use. When you enter this section to print
this report, the system will ask you the standard questions of every section
such as, what patient classifications to include in the report, and for what
physician codes, etc...
Ref. Physician
to include:
Enter the
internal physician code, which corresponds, to the doctor for which you want
the requested statistical information. If your office does not want to
distinguish statistical information between doctors, simply leave this field
blank by pressing <ENTER>. For a list of all available physician codes
click on the drop down arrow located in this field and choose from a listing of
your internal codes for Referring physicians
Include
Details
Enter
"Y" if you want the report to be in detail. That is, for each and
every patient it will list the patient name for which each transaction took
place, and a detail of each transaction, rather than simply providing lump
totals. At times it might be best to request statistical reports without
detail, as the report, might take a substantial amount of pages. In order to
obtain the report without detail simply enter "N".
F. Income by
Physician
This report
provides a performance production analysis by doctor. This is greatly used in
offices with more than one doctor to identify, for any requested period of
time, how much each doctor has billed versus how much money each has actually
brought in, during the same period. You may request the report with or without
detail. With detail will include the name of each patient per transaction
posted, and the respective amount. This will be helpful to identify when
sometimes the services of one doctor are inadvertently posted as though another
rendered them. Should you ask for the report without detail, it will simply
provide lump totals. When you access this section, the system will ask for the
standard questions of every section.
G. Income by Ins. Company
This report
will give you how much monies come into your practice by each individual source
of income for any period of time requested. This report bases its output on
the entry that you make when posting payments, and the system asks for the
source of payment. This is a good report for the analysis of where the bulk of
the practice money is coming from. If your cash paying patients are producing
a very low amount of income, compared to other sources then you could decide to
perhaps give cash paying patients incentives to bring them in to your
practice. Whatever you decide to do, or take action upon, this report will
help you make a proper decision based on production and income. When you enter
this section the system will ask you all the standard questions of this
section. One of the questions in this section is "Include detail ",
by answering "Y" to this question, the system will print out the
report with the detail of every transaction broken down by patient and by
date. If you request this report with no detail, then the system will only
give you total amounts by each source of payment requested.
H. Income by
Procedures
This report
will allow you to analyze how many times a certain procedure has been performed
by your practice, for periods of time hereby set forth. This report will give
you a listing by date of service for the patients who have had the procedure
done. This report can be requested for specific procedures, or for all
procedures rendered in your practice. This report can show that perhaps there
might be certain procedures that you do not perform often which do not bring
much income, and it might be best you to invest that time doing other more
productive services that will bring more revenue to the practice. Also this
report is used by many offices to identify and keep track of the last time when
a particular procedure was billed (Usually better paid ones); this way, they
can quickly notice when they may once again commence using it for billing.
These are the kinds of analysis that you can make based on the information of
this report. Refer to page 12-37 for an example of this report. When you
enter this section to request the report the system will ask the standard
questions of every section, and then the following special question;
Procedure to Include
Enter here if
you want only a specific procedure on this report, which one it is, if you do
not remember it click on the drop down arrow and choose the appropriate
internal code. If you want all procedures on this report leave this blank.
Note: For
those offices using the line item posting function of the system, this report
will display procedure income based on the line item. Once again if your
office is using line item this report will be more detailed, as the system will
not only give you analysis by the amount billed, but it will give you the
amount paid by each procedure.
Include
Details
Enter
"Y" if you want the report to be in detail. That is, for each and
every patient it will list the patient name for which said transaction took
place, and a detail of each transaction, rather than simply providing lump
totals. At times it might be best to request statistical reports without
detail, as the report, might take a substantial amount of pages. In order to
obtain the report without detail simply enter "N".
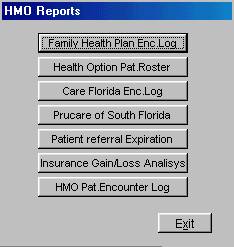
F. HMO Reports
The reports in
this section are custom depending on the necessities of the practice, and the
HMO that requires these reports. This menu consist of the following:
I. Family Health
Plan Enc. Log
II.
Health Option Pat. Roster
III.
Care Florida Enc. Log
IV.
Prucare of South Florida
V.
Patient
Referral Expiration
VI.
Insurance Gain/Loss Analysis
VII.
HMO Pat. Encounter Log
Figure
I.7
The above
reports are self-explanatory and the fields of entry have been explained
numerous times in this manual, for further assistance if needed in these areas
you can use the F1 help key to guide you in these areas.
SUMMARY
We have now
completed the System Reports section of the package. As you may have seen
there is an endless array of reports that you can get from the system. The
proper use of these reports can be very powerful to you in all aspects of
managing and decision making in your practice. We strongly recommend that you
go through these reports and print them all, in order to properly analyze what
kind of information they can give to you. Sometimes you can get a better
perspective of the nature of a report, and its content, once seen. You will
not affect any data by requesting these reports, nor do these reports have
closing on them that once you select them you cannot print them again. Once
again these reports can be extremely powerful management tools, but if they are
not used and requested they will never help you with anything. One of the most
important reasons for an office to automate through computers, is to take
advantage of its powerful reporting capabilities, and with the quickness that
it performs it. Some of the reports in this section may take months to process
manually, when the system can do them in minutes. Furthermore, it is
imperative that once you have begun using your system that you analyze all the
reporting that the system can give you, and use them to manage your practice.
The next chapter in this book has been dedicated to giving you examples of all
the reports that the system can print. If you choose not to print these
reports, you can refer to the next chapter for an example of their output.
Nevertheless, it is important that you print the reports, therefore you will
have data that is relative to your practice.